Modifying Site Content
See this short video that walks you through the simple steps to add a new page to your website and put some content on that page and this video showing you how to add an image.
If you have System Administrator privileges for this site, you will be able to modify much of the content on the site. The content on a page is edited using an editor that operates directly in your browser without the need for any additional software. If you need help with that see the Help on Editing Your Personal Page or jump to particular topics (Hyperlinks, Images, Tables).
Overview
Your site is composed of a set of dynamic pages based on one or more custom layouts. The actual content (text on the pages) is stored in a database and retrieved when the page is loaded. The layout includes certain characteristics that affect the general appearance such as background color, navigational links, etc. Each layout has at least one and potentially several content areas. A "Content Area" is a rectangular portion of the page where you can place "Content".
Getting Started
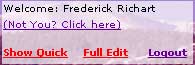
For some websites, everyone accessing your site will see a greeting box at the top of each page. The greeting box indicates login status and has links for logging in and out. As a system administrator you will have two additional links in this greeting box. One link is titled "Show Quick " and the second is titled "Full Edit ". The sample on the right shows you an example of the greeting box with the System Administrator Links.
Note: The appearance of the greeting box is very site dependent. For many sites a user must be logged in before a "greeting box" appears. To login to a site like this, your login page can be reached by http://yoursite.com/Login/login.php (be sure to only append the 'Login/Login.php' to your actual site address).
The "Show Quick " link does not switch to another page, but rather redraws the current page highlighting each Content Area. Each area is redrawn with a box around the content area and an edit link. The edit link brings up a page on your site that has an edit window to modify that particular Content Area. There are some limitations but it is the easiest way to make quick changes to your page.
The "Full Edit " link takes you to a content management page on fredsusedwebsites.com. This page provides a more complete method to manage the content of a given page. Here you can modify the page's meta information including the title (as seen on the title bar of your browser window), and the description and keywords meta tags used by search engines. A key thing to remember is that should you want to upload an image to the server, you can only do that from the Full Edit page.
Quick Edit Mode
Take a look at the two examples below to see 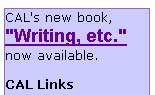
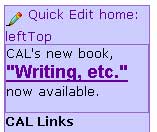 the results of quick edit. On the left you see a clip of a small area of the web page. The clip is a portion of text near the top of the side navigational links on the web page. On the right you see the same area of the web page when quick edit is enabled. You can now see that there is a very small content area just above the side links of this page. The content area now has a surrounding box to let you see what is included and a link just above. Click on the link to bring up the edit window you see below.
The Quick Edit window is a special page on your site where the main content area is an editing window for a given content area. You are now able to type changes in this content area in much the same way you would edit a normal document. At the bottom of the window is a tool menu enabling you to edit special effects. The icons used are common symbols used in most document editors so we won't cover them here.
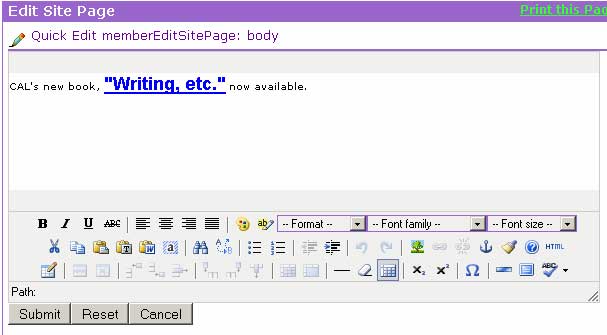
When you are satisfied with your changes click Submit to update the database with the new content or click Cancel to ignore the changes you made. Both cause you to go back to the original page you were viewing prior to clicking Quick Edit. The Reset causes all changes you made during this edit to be dropped and the edit window reverts to the original state it was in when you started editing.
Note: One key difference between the editor in the quick edit page and the full edit page is the control to manage images (view by clicking ![]() ) is not enabled to upload images to the site's upload directory. You are able to manipulate existing images, and you can drag/drop images from other sites such as Photo Bucket. Just remember that those images are linked to the other site and are available as long as that site maintains them.
) is not enabled to upload images to the site's upload directory. You are able to manipulate existing images, and you can drag/drop images from other sites such as Photo Bucket. Just remember that those images are linked to the other site and are available as long as that site maintains them.
One other handy little trick is that you can resize the edit window to your liking. In the example above note the diagonal lines in the very bottom right corner of the edit window. This is the resize handle. Just click on this and drag the lower left corner of your edit window to make it larger or smaller. You are able to change both the width and height of this window.
Full Edit Mode
You need to use Full Edit mode whenever you want to upload images to your site's upload directory or when you want to manage the page's META information. Other features you may have on your site other than simple content editing are also managed here. Such things include viewing site visitor statistics and features such as publication pages. Clients of Fred's Used Websites that do not have their own site login capability must use this method for editing pages and don't have quick edit capability.
When you c lick on the "Full Edit" link a new window will open and you will be automatically logged into your account at fredsusedwebsites.com and brought to the "Modify Content" page for the given page on your site.
The image on the right is a small clip of that edit page. Note the links on the left bring you to other site management functions you can perform while logged into your account at fredsusedwebsites.com.
When you click on the "Modify Content" link you are shown a list of all your site pages from which you can edit. "Site Statistics" show you interesting information about who is visiting your site and the "Your Account" link is used to see your account status with Fred's Used Websites. Remember that when you access this page you are logged in on the site account at Fred's Used Websites. This is different than your own site login and you should make sure that you logout from both if you are on a public computer.
Refer to the large clip below as your read the following.
The headers or page meta information can be seen at the very top. The "Page Title" is normally visible in the title bar of your browser window. This plus the other meta information are very important for search engine visibility. When you perform a search on Google or one of the other search engines, the result list is typically the content of your "Page Title" and "Meta Description" fields. If you don't have these, the result will be some snippet of text the search engine chooses to display. It is very important that the information the user sees on the search screen is written in such a way that they are compelled to click you your link rather than someone else. You should think about what these fields contain. The "Meta Keywords" is a useful place to reinforce the search terms you want to be found with. It is also a useful place to put common mis-spellings of words searchers may type. In general make sure the keyword phrases are consistent with the content of your page to help the ranking of your page in the search list.
Below the page meta information you will see one or more edit windows. Each window represents one Content Area for that page. The edit dialog is nearly identical to the edit dialog described above in the quick edit mode. One significant difference is that here you have access to an image manager and a file manager. These managers allow you to upload files to your site's upload area. The image manager also permits you to do image manipulation such as resizing, cropping, etc.
